How to Add a Reservation
Watch video:
Overview:
- Use the special party-size shortcuts to quickly launch the reservation form with predefined date, time and number of guests:
- Choose the requested time. A zero in the "Available Slots" or "Remaining CC" columns means no availability:
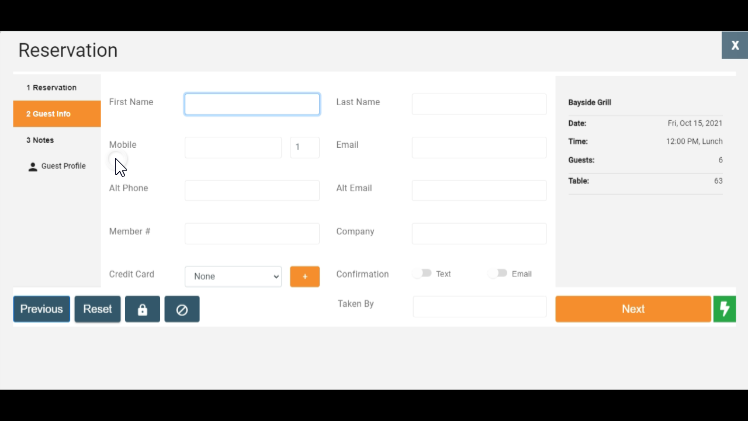
- The reservation form will show, you may now enter your guest’s details:
- Reservation details show on the right side while actively booking:
* A "Guest Message" is a note that you want to include in the text or email confirmation that goes to the guest when the reservation is booked.
- Click "Create Reservation" and you should see your reservation in the log:
- Another way to add a reservation is through the green phone icon near the top right corner:
- The Reservation form starts with a blank party size, choose the party size to start your reservation. Select "Next" to move to the "Guest Info" section:
- If you are entering a guest's name that is recognized by the system, it will provide archived information:
- Click "Create Reservation" to complete the booking:
- If an email or mobile phone number (text package required) was included with the guest's information, reservation details will immediately be sent to the guest.


Priority Settings:
- Hours of Operation
- Inventory
Optional Settings:
- Auto-Assign: Let RestaurantConnect choose a table when a reservation is booked.
- Quick Requests: Reduce repetitive typing with predefined keywords.
- Auto-Agreement: Trigger a reservation for larger parties.
- Taken-by: Require a user's name or initials for better operational accountability.
- Permissions: Enable or restrict user's ability to exceed inventory limits.
- Tax reservation confirmations & reminders: Enable text communications with guests.
- Reservation policy: Include in guest communications for reservation confirmations and reminders.